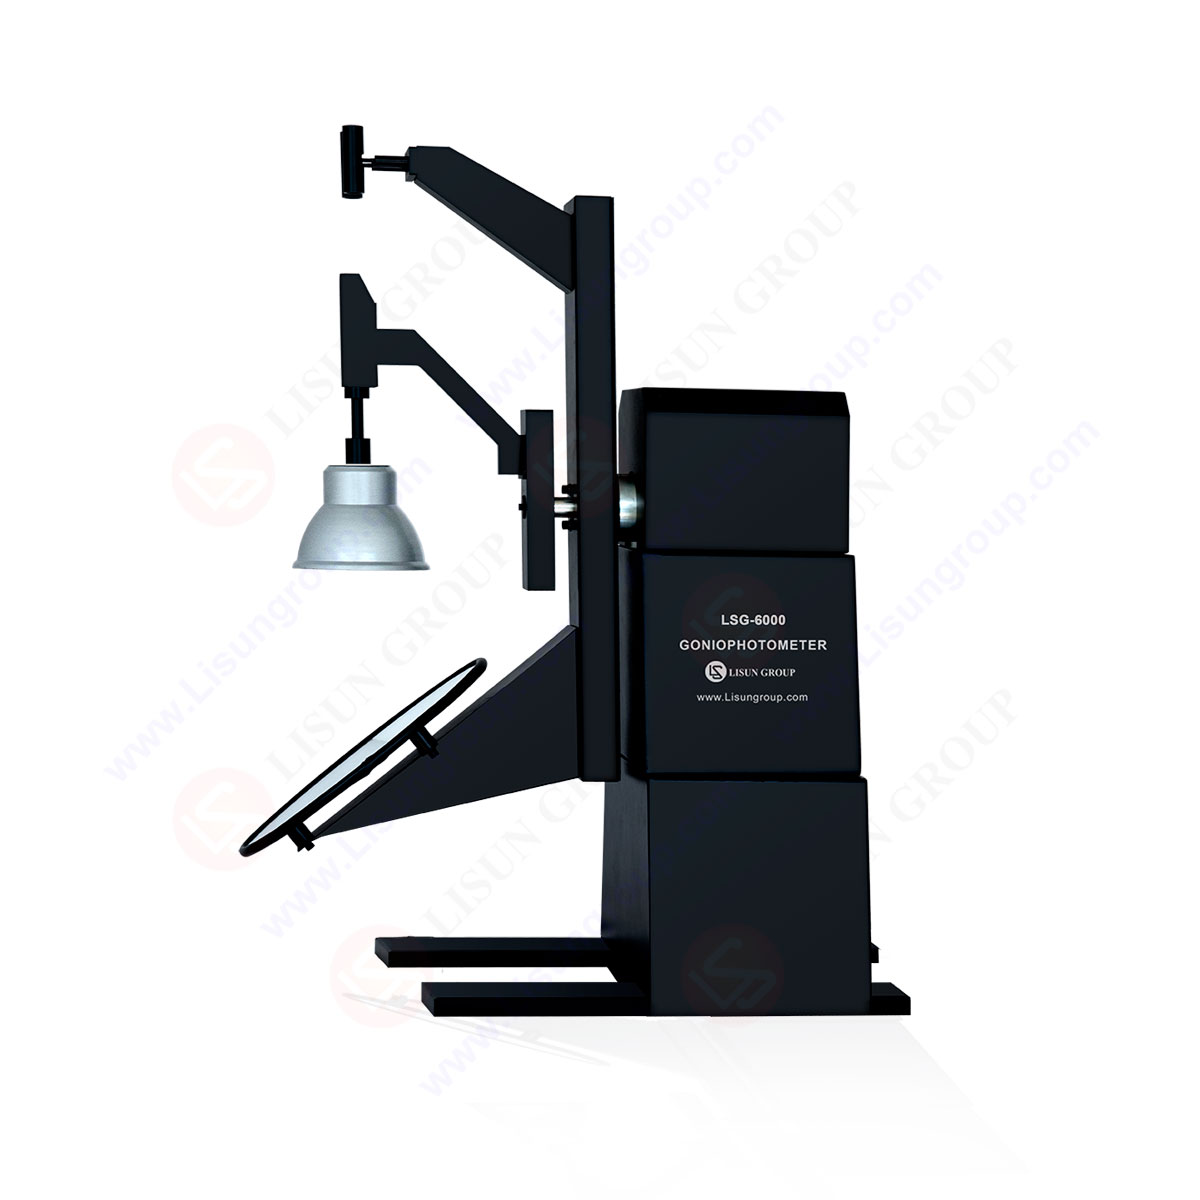
LM-79 Moving Detector Goniophotometer (Mirror Type C)
LSG-6000

High Precision Rotation Luminaire Goniophotometer
LSG-1890B
High Precision Rotation Luminaire Goniospectroradiometer
LSG-1890BCCD
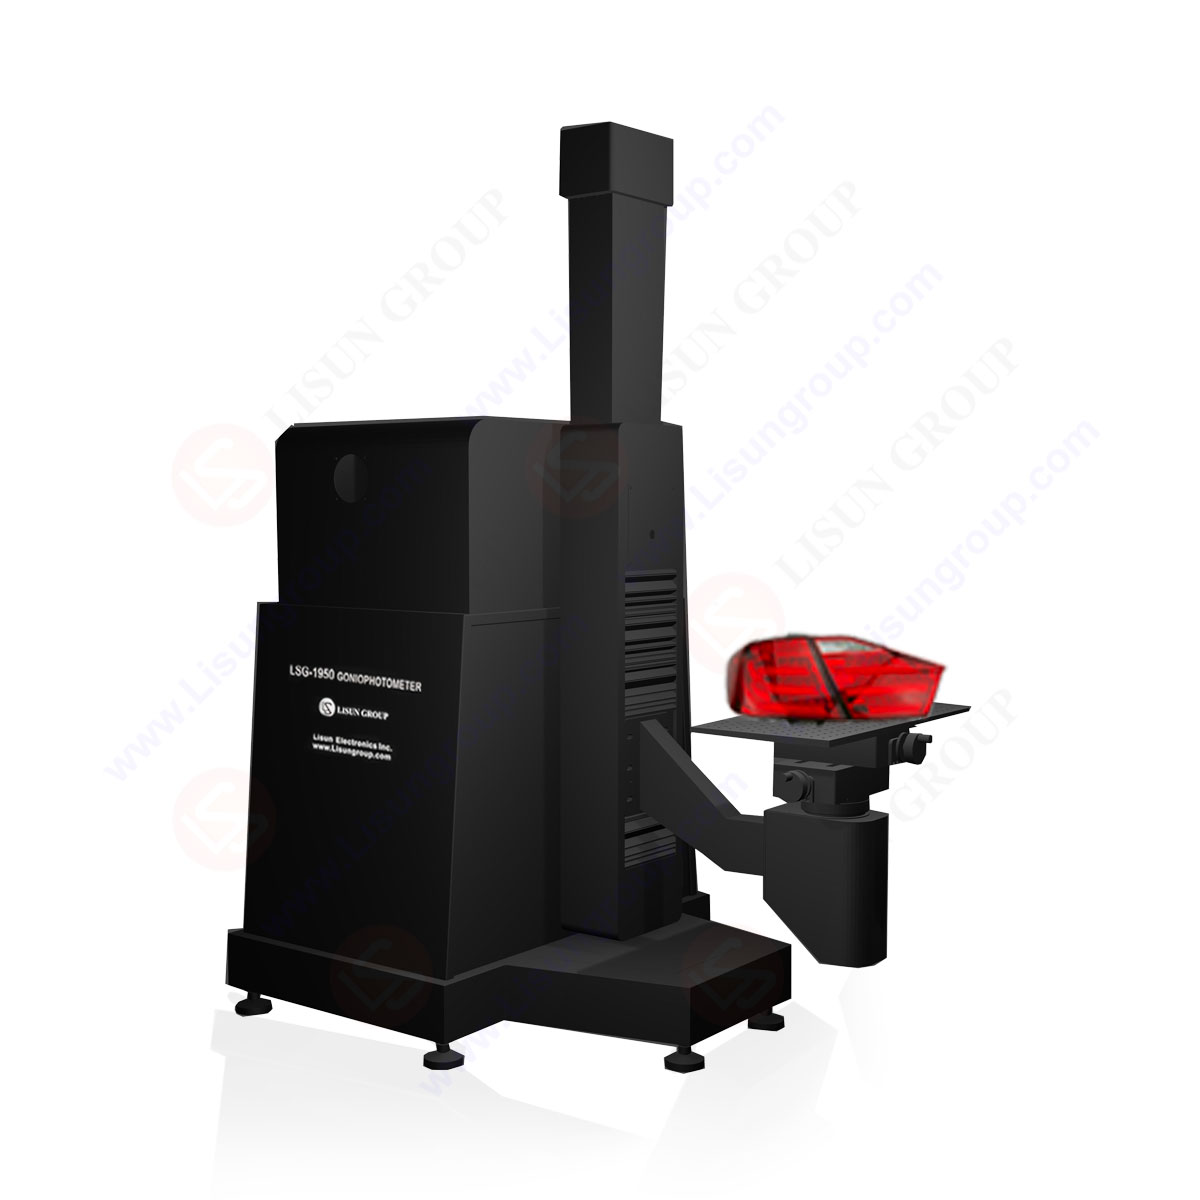
Goniophotometer for Automotive and Signal Lamps
LSG-1950
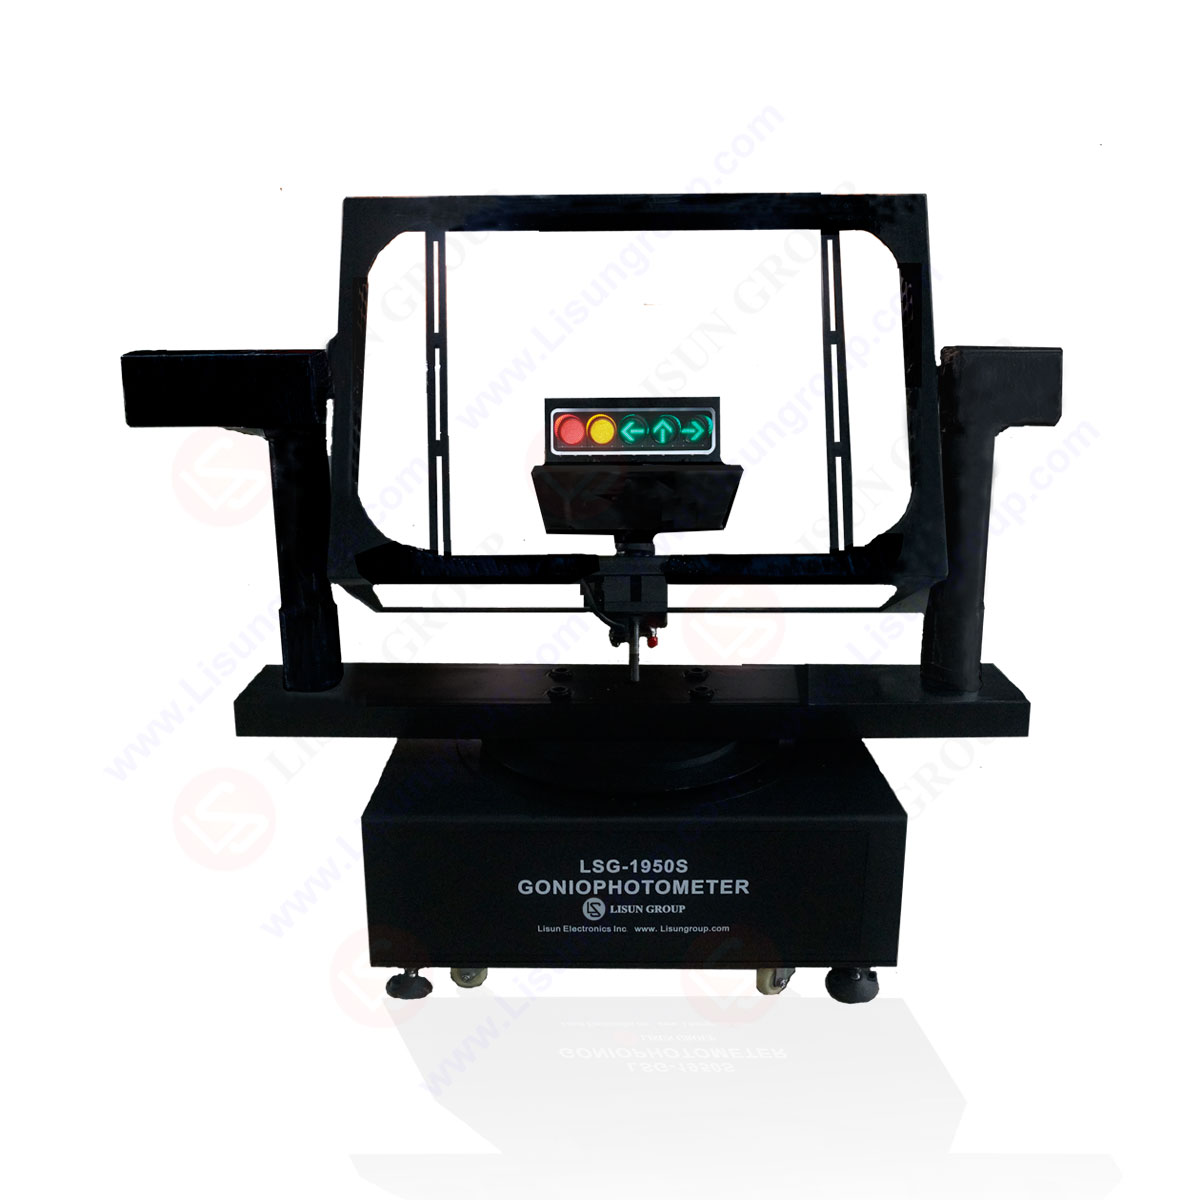
Goniophotometer for Traffic Signal Lamps
LSG-1950S
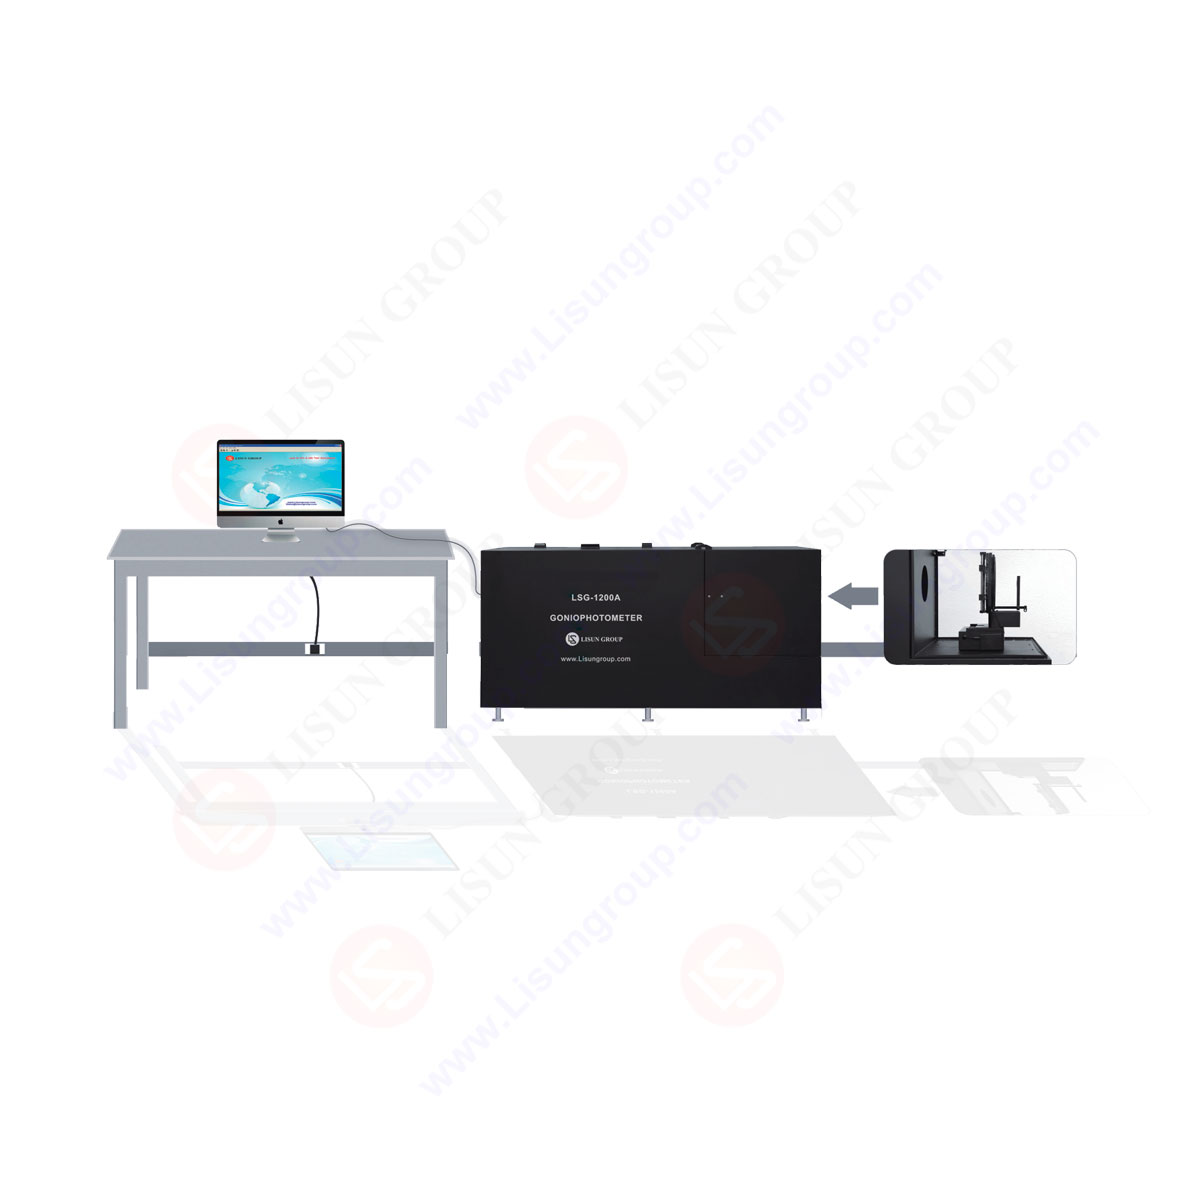
Compact Goniophotometer
LSG-1200A

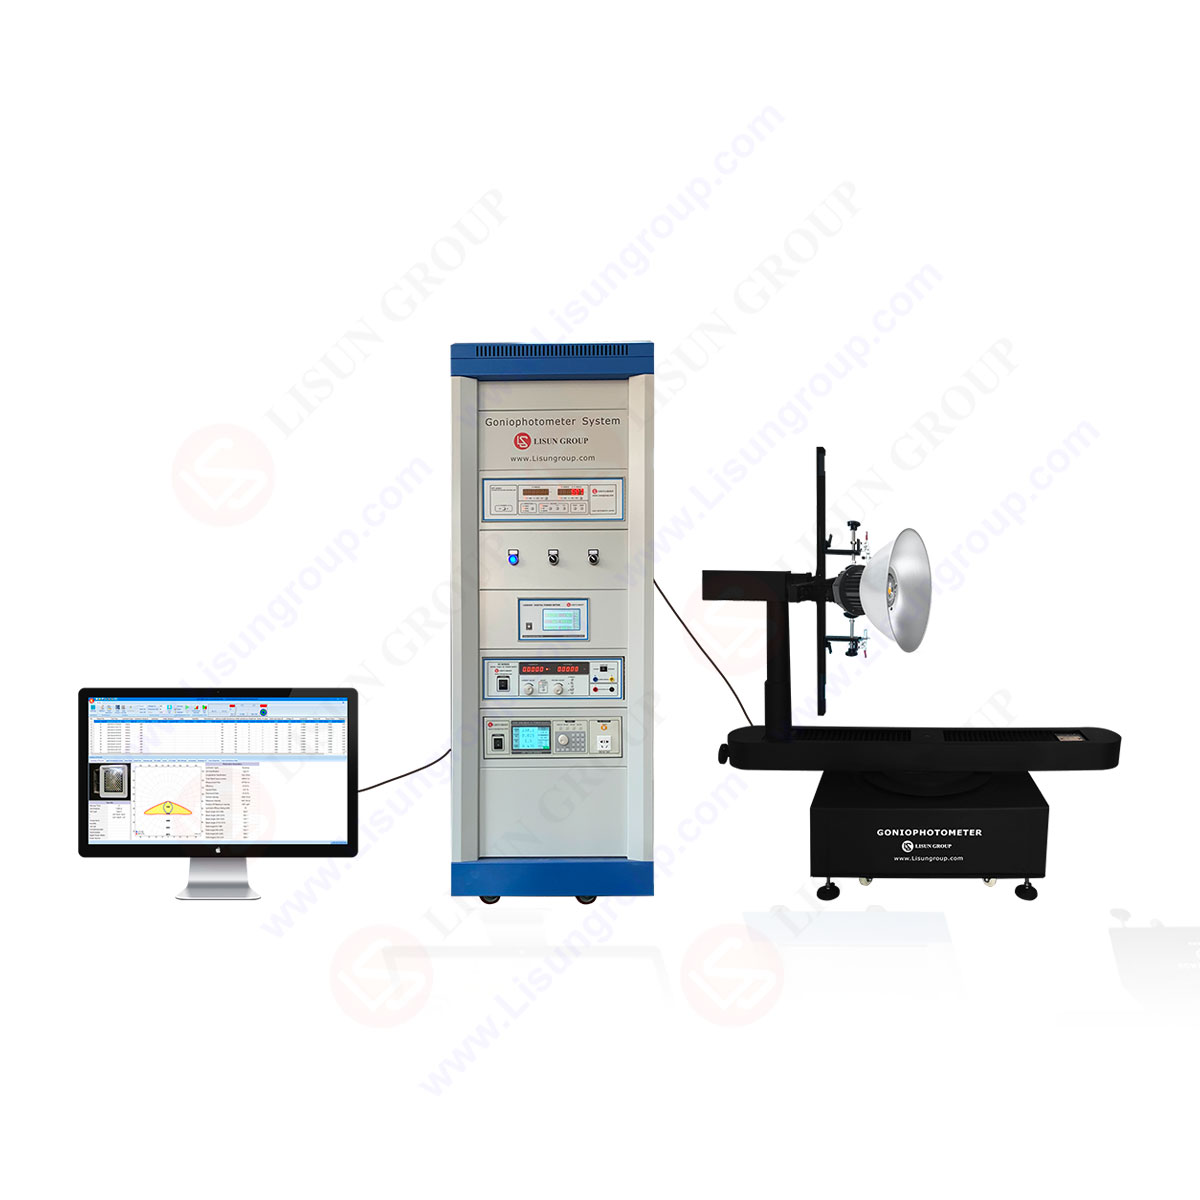
Near Field Moving Detector Goniophotometer
LSG-1900B
Select an organization
to browse standards

The full name of IEC 60695-2-2 is Fire hazard testing Part 2: Test methods – Section 2 Needle flame test. Needle flame test was prepared by IEC technical committee 89: Fire hazard testing. The following is the related introduction of IEC 60695-2-2 Scope.
This section of IEC 60695-2-2 specifies a needle flame test to simulate effect of small flames which may result from fault conditions within equipment, in order to assess by a simulation technique the fire hazard. It is applicable to electrotechnical equipment, its sub-assemblies and components and to solid electrical insulating material or other combustible materials.
The accessories include; exhaust pipe, power cord, remote control, igniter, gas supply device, butane gas, hose, spare fuge, gauge, silk paper, residue collector, thermocouple.

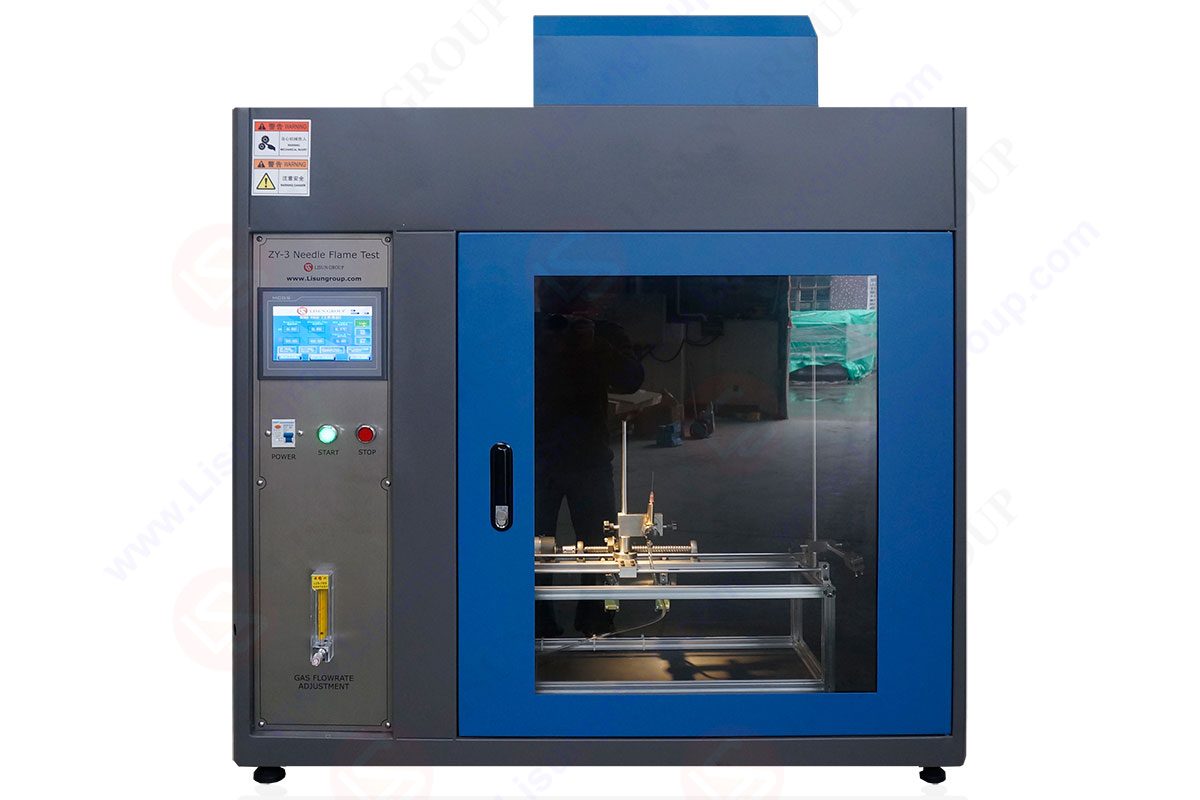
ZY-3 needle flame test equipment
There is also a plastic bag in the package that contains a CD, calibration certificates, and guarantee cards. There are user manuals, operation video, and related standards on the CD.

Needle flame tester
• Open the front door of the chamber.
• In order to avoid damage to the instrument, use the cable wires to fix the internal accessories before the transportation.
• Now, remove the cable ties. The exhaust pipe needs to be installed on the back of the chamber. Connect to the outdoors to exhaust the smoke generated during the test.
• Use the hose to connect the chamber with the gas supply device. Install the butane canned gas.
• The notch position is upward. Install it into the gas supply device.
• Press the black button to lock the canned device. Then, turn the knob to the maximum position. Connect the power cord to the 220 volts 50 HZ power supply.
• Turn on the switch. Press the ‘’START’’ button to turn on the chamber.
• Touch the screen to enter the ‘’WORKING INTERFACE’’.
• The remote can control the four buttons ABCD here. A switch for lighting is present, along with the switch for exhaust.
• Now, enter the ‘’PARAMETER INTERFACE’’. Set burning time and ‘’AFTER FLAME TIME’’ according to the standard.
• The ‘’TIME RATIO’’ does not need to be modified. The two temperatures on the right side of the screen are set to 100 degrees Celsius and 700 degrees Celsius.
• It is used to measure the temperature rise time of the thermocouple copper black.
• According to the standard, the temperature rise time from 100 degrees Celsius to 700 degrees Celsius is 23.5 (22.5-24.5) seconds.
• ‘’Temperature Correction’’ does not need to be modified.
• Before the testing, we need to confirm that the temperature rise time of the copper block meets the standard.
• Now, connect the thermocouple. Now, you can see the real-time temperature value of the copper block on the screen.
• When the temperature is lower than 100 degrees Celsius, the temperature rise time should be 0. If not, click the Reset button to reset all the parameters.
• First, adjust the needle flame copper tube to the vertical direction. Click on ‘’GAS CONNECT’’.
• You will hear the sound of the solenoid valve opening. The gas is connected to the chamber. Use the igniter to light the flame.
• Adjust the air knob here and use the gauge to ensure the flame size meets the standard requirements.
• After the flame is adjusted, click on ‘’GAS CONNECT’’ to stop the gas.
• There is no need to adjust the gas flow knob again in a short time.
• After using it for a long time, the airflow knob can be fine-tuned again to ensure the flame meets the standard.
• Use the other end of the gauge to confirm the position of the thermocouple copper block.
• Click on ‘’GAS CONNECT’’ and ignite the gas.
• The copper begins to warm up. The timer starts when the temperature reaches 100 degrees Celsius.
• The timer stops when the temperature reaches 700 degrees Celsius.
• According to the standards, the temperature rise time should be between 23.5 seconds and 25.5 seconds.
• Click ‘’Reset’’ to reset all the temperatures. Unplug the thermocouple and save it when the copper cools down. Adjust the direction of the copper tube to the angle required.
• Click ‘’START’’ to start without the flame. The needle goes to the right and stops. Install the sample according to the position of the needle.
• Place the silk paper and the residue collector below the burning point. Click ‘’RESET’’ to reset the needle position and the timers.
• Click ‘’GAS CONNECT’’ to connect the gas and ignite the gas.
• Close the door of the chamber.
• Click ‘’START’’ to start the test. After setting the burner time, the gas will be automatically disconnected, and the needle will automatically return to the initial position.
• Click ‘’after flame pause’’ when the flame on the sample goes out.
• If the sample does not catch fire, you do not need to click the position mentioned.
• You can open the chamber to check the status of the sample. The needle flame test chamber is easily soiled by the smoke and combustion residues produced by the combustion.
• It is necessary to clean it regularly. Especially cleaning the needles.
• Do not leave burning residue on the needle. Normally, the butane gas and gas supply devices are protected.
• Angle of burner: incline with 45° (when in test) / plumb (when adjusting the flame’s height)
• Needle flame burning time: 0~999.9s±0.1s adjustable (the 30s in general)
• Sample burning time: 0~999.9s±0.1s, auto mark and pause manually
• Height of flame: 12mm±1mm (gauge is included)
• Burning air: 95% outages
• Test range of temperature: 0~1000℃
• Requirement of flame’s temperature: the temperature rises from 100℃±2℃ to 700℃±3℃ within 23.5 seconds±1s
• Temperature testing thermocouple: Φ0.5mm K pattern thermocouple
• Applied with touch screen and remote control
In the case of horizontal needle flame test HB classification, the sample size should be 125mm in length, 13mm in width, and no more than 13mm in thickness. Place the sample horizontally, and the sample clamp is clamped to one end of the sample.
Place the ignition device at a 45-degree angle to keep the flame position unchanged. Apply 30±1S to the other end of the sample holder. Place a metal mesh and a freely movable fixed frame horizontally under the sample holder. So, when the sample burns, the free end, and the metal mesh are kept 10mm.
Lisun Instruments Limited was found by LISUN GROUP in 2003. LISUN quality system has been strictly certified by ISO9001:2015. As a CIE Membership, LISUN products are designed based on CIE, IEC and other international or national standards. All products passed CE certificate and authenticated by the third party lab.
Our main products are Goniophotometer, Integrating Sphere, Spectroradiometer, Surge Generator, ESD Simulator Guns, EMI Receiver, EMC Test Equipment, Electrical Safety Tester, Environmental Chamber, Temperature Chamber, Climate Chamber, Thermal Chamber, Salt Spray Test, Dust Test Chamber, Waterproof Test, RoHS Test (EDXRF), Glow Wire Test and Needle Flame Test.
Please feel free to contact us if you need any support.
Tech Dep: Service@Lisungroup.com, Cell/WhatsApp:+8615317907381
Sales Dep: Sales@Lisungroup.com, Cell/WhatsApp:+8618117273997
There are some standards focus on specifying technical requirements and test methods for different categories of lampholders in the lighting field, ensuring their safety, compatibility, and...

LISUN’s Motor-Operated Tool | Power Tool Testing solutions strictly comply with a range of core international standards, providing full support for safety and electromagnetic compatibility (EMC)...

LISUN’s electric toy testing solutions cover IEC 62115, EN 71-1, ASTM F963 standards. Including electrical, mechanical, flammability tests to ensure toy safety compliance globally.

LISUN’s audio-video communication testing solutions meet CISPR 13, IEC 60065, FCC Part 15 & EN 55032. Cover EMC, safety & performance tests for reliable AV equipment...
LISUN has all equipment according to the IEC60669 measurement, including environmental chamber, IP code waterproof dustproof test, switch lift test, etc.

LISUN provide full test solutions for HID lamp, including integrating sphere system, goniophotometer system, EMI EMC chamber, HID ballast tester, electrical safety test, etc.

Lisun can supply full test solutions for fluorescent lamp, including integrating sphere system, goniophotometer system, EMI EMC test, electronic ballast tester, electrical safety test, etc.

For the CFL design and manufactory, LISUN can supply a full quality control test solution, including photometric, colorimetric, electricity, flicker, IES candela distribution, surge test, electrical...
LISUN’s indoor and outdoor LED test solutions meet IEC 60598-1, IEC 62722-2-1, CIE 121 standards, covering safety, photometry, and environmental tests for global compliance.

 中文简体
中文简体