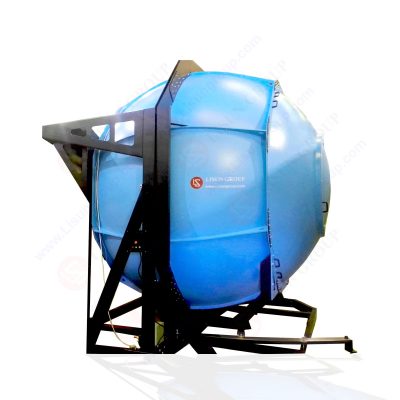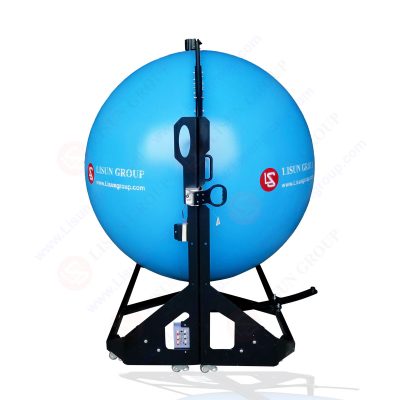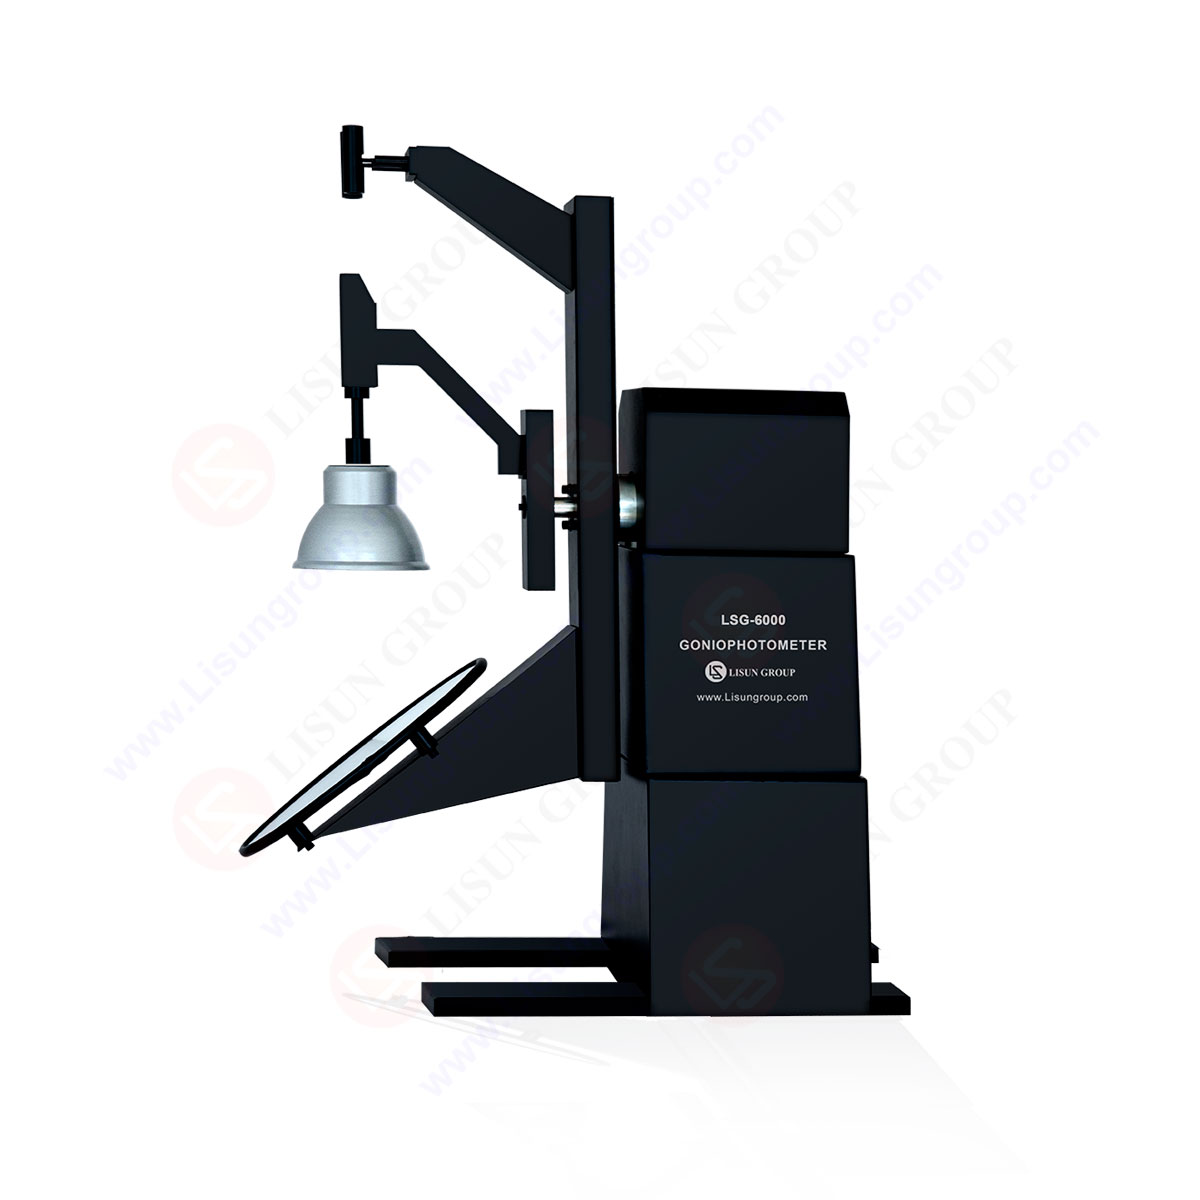
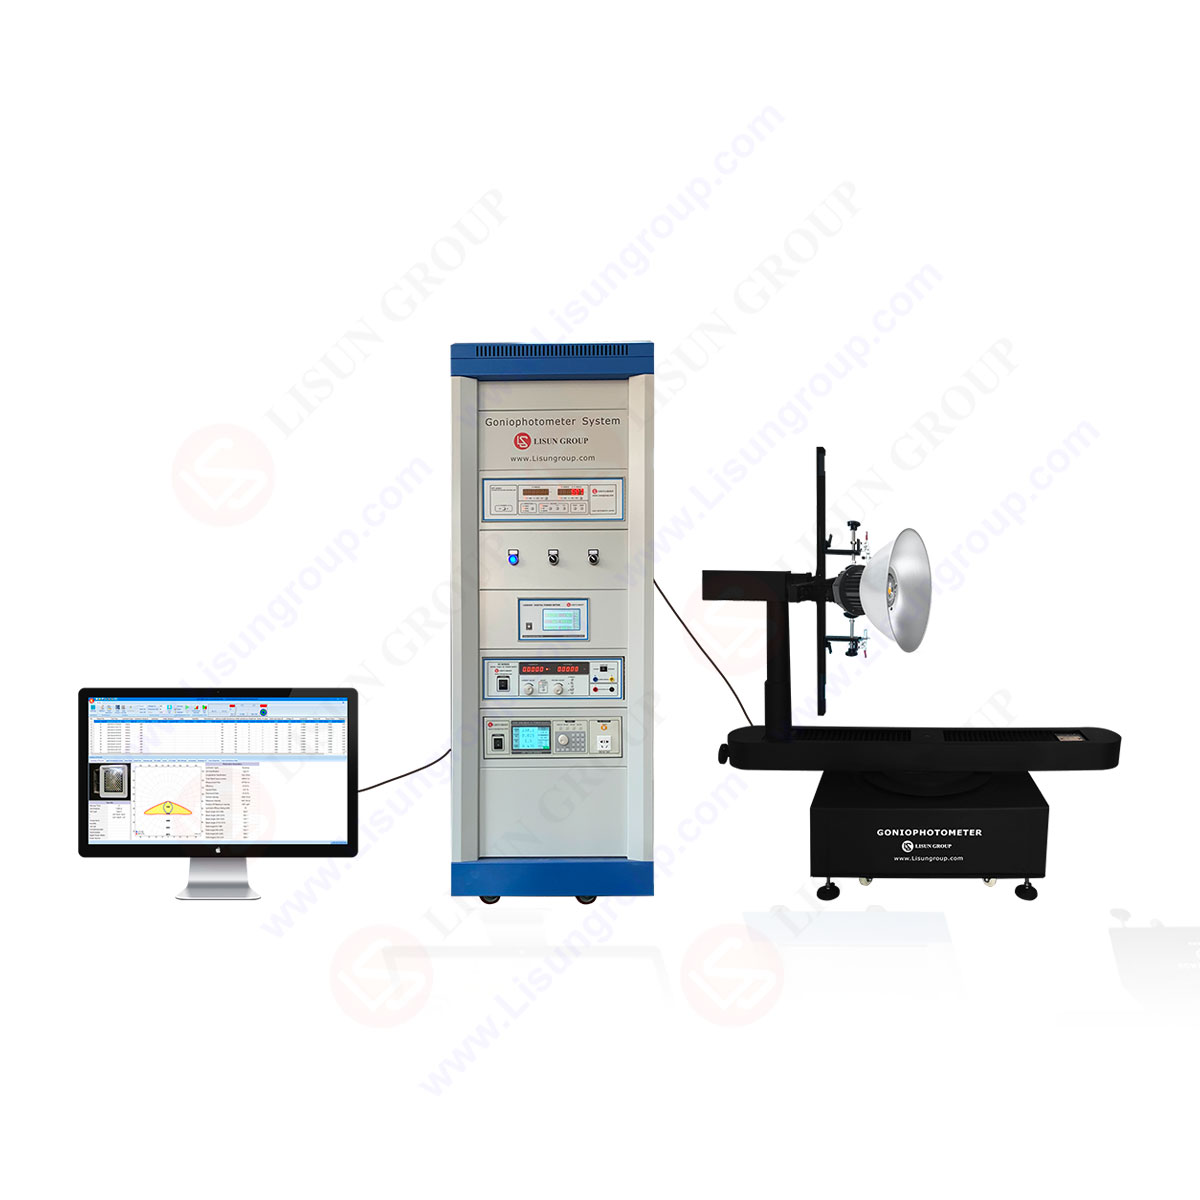
LM-79 Moving Detector Goniophotometer (Mirror Type C)
LSG-6000

High Precision Rotation Luminaire Goniophotometer
LSG-1890B
High Precision Rotation Luminaire Goniospectroradiometer
LSG-1890BCCD
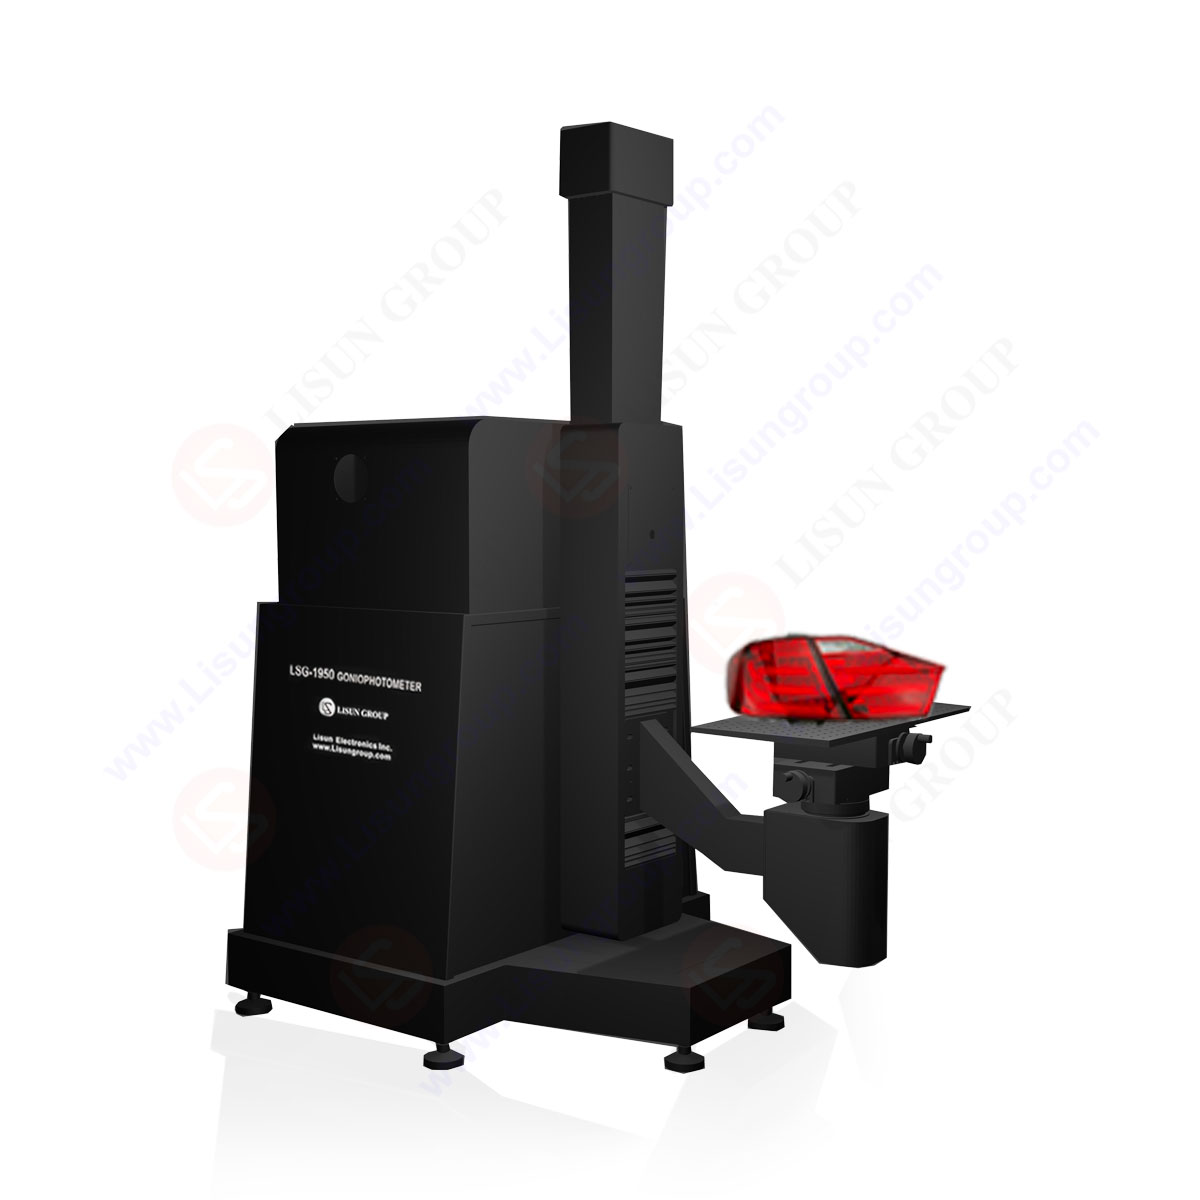
Goniophotometer for Automotive and Signal Lamps
LSG-1950
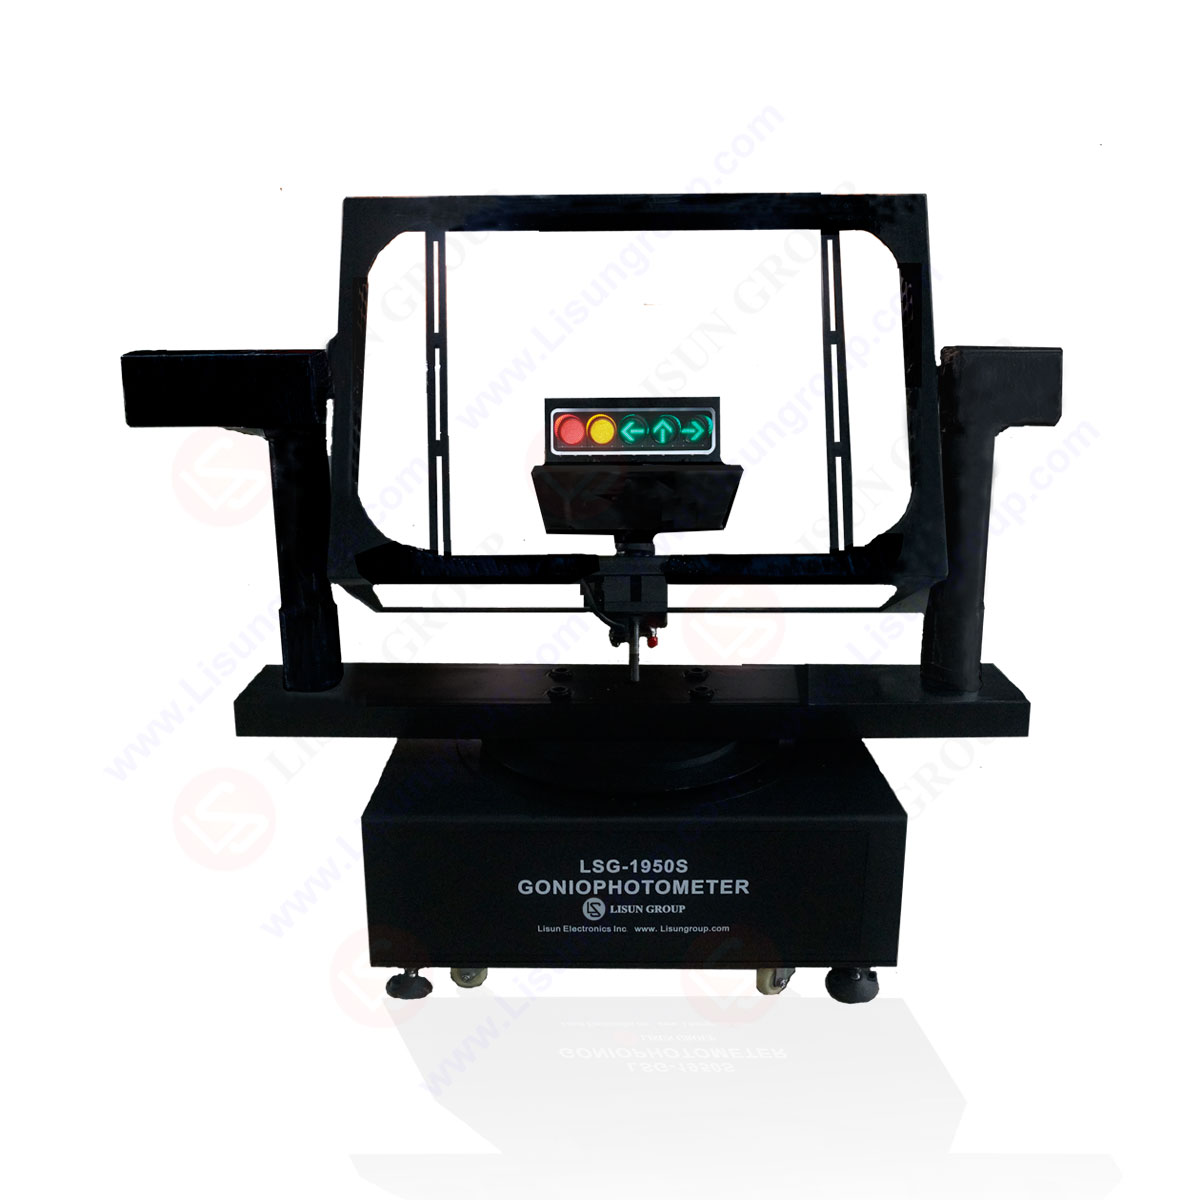
Goniophotometer for Traffic Signal Lamps
LSG-1950S
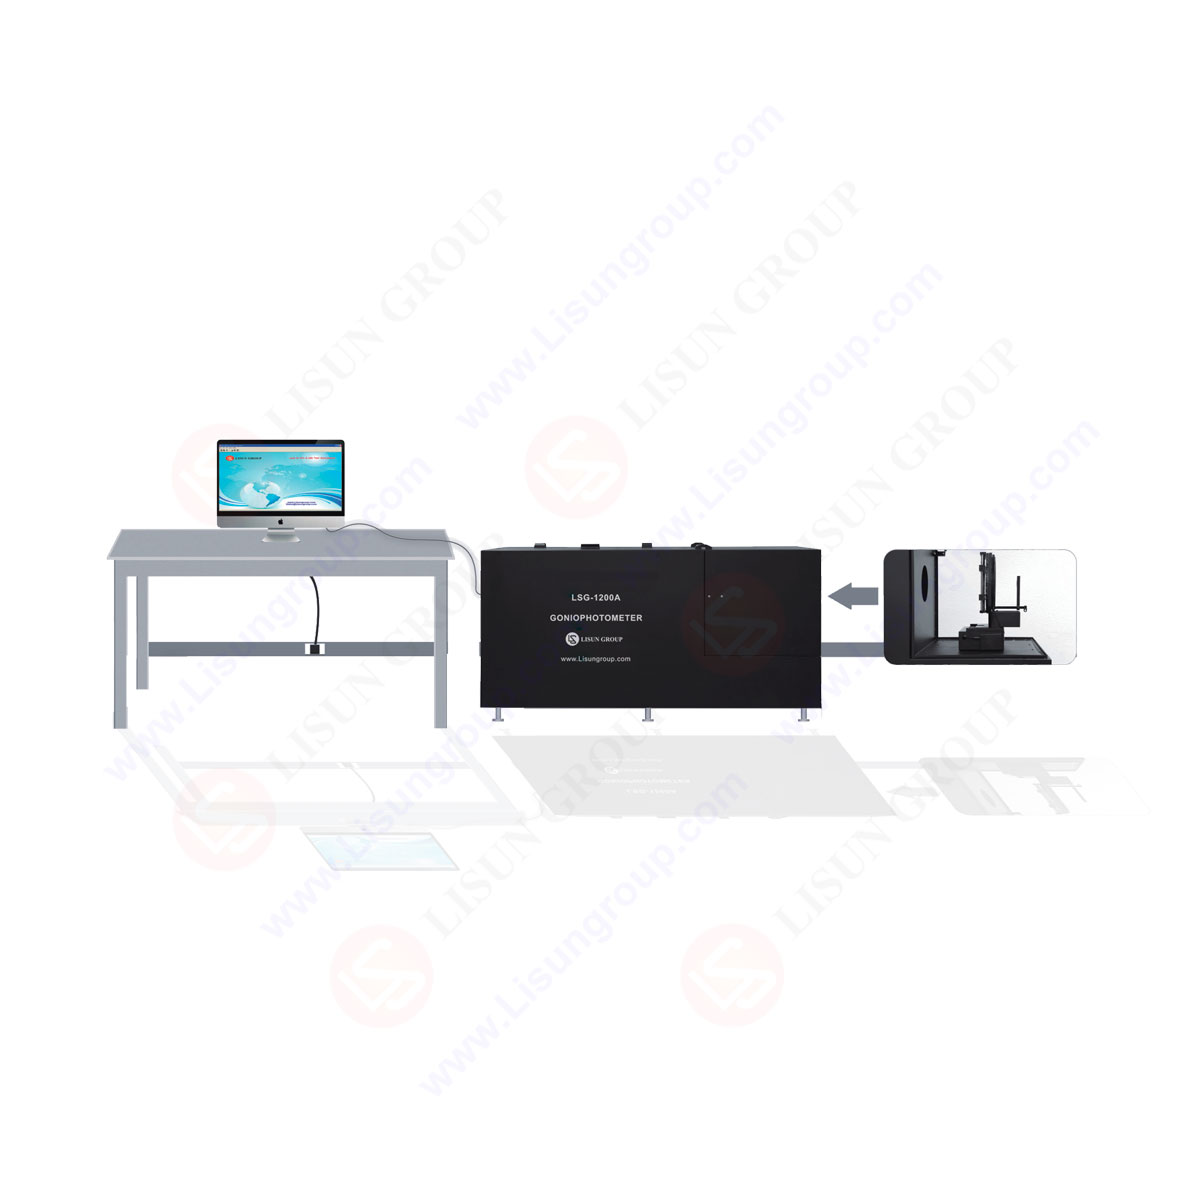
Compact Goniophotometer
LSG-1200A

Near Field Moving Detector Goniophotometer
LSG-1900B
Select an organization
to browse standards
1. Operation steps:
1. First connect the probe and optical fiber to the corresponding position of the integrating sphere, and fix it.
2. Turn on the DC power supply of the integrating sphere system configuration.
3. Turn on the computer, then open the computer desktop test software, and select “System Settings” on the software, and connect the DC power supply, the electric parameter meter and the spectrometer to online communication to see if the communication is normal.
4. Install the matching standard lamp in the integrating sphere (note: wear white gloves, do not touch the standard lamp directly with your hands, especially the glass part), and then close the integrating sphere.
5. Adjust the power mode to DC power supply on the software.
2. Spectral integrating sphere calibration:
1. Connect one end of the connecting wire to the output terminal (red and black) of the DC power supply, and the other end to the terminal of the integrating sphere.
2. Install the standard lamp and turn on the DC power switch to adjust the current output so that the output current is consistent with the current value on the standard lamp calibration report. Warm up the standard lamp for 15 minutes.
3. Open the test software, click the spectral calibration button, enter the calibration dialog box, check whether the color temperature is consistent with the color temperature value in the standard lamp calibration report, if it is consistent, click Start, click OK in the pop-up adjustment slit dialog box, the instrument will be completed automatically scan by itself, just click after the file format is saved.
3. luminous flux customization:
1. Open the test software, click the luminous flux calibration button, enter the luminous flux calibration dialog box, click start, the instrument will automatically complete the test. At the end of the test whether to save this data dialog box pops up, click Yes and enter the standard lamp calibration luminous flux value on the report, click OK.
2. Click the luminous flux test button to enter the luminous flux test dialog box, click start, the instrument will automatically complete the test, and the report will be output when the test is over, compared with the data on the standard lamp calibration report, the allowable error of color temperature is ±5K, and the allowable error of luminous flux is 3‰. If it is within the range, the calibration is successful, if it is out of range, the above steps need to be repeated.
3. Adjust the current output of the DC power supply to the minimum, make the window display zero, and then shut down. After the standard lamp has cooled down, remove the standard lamp and put it back into the box.

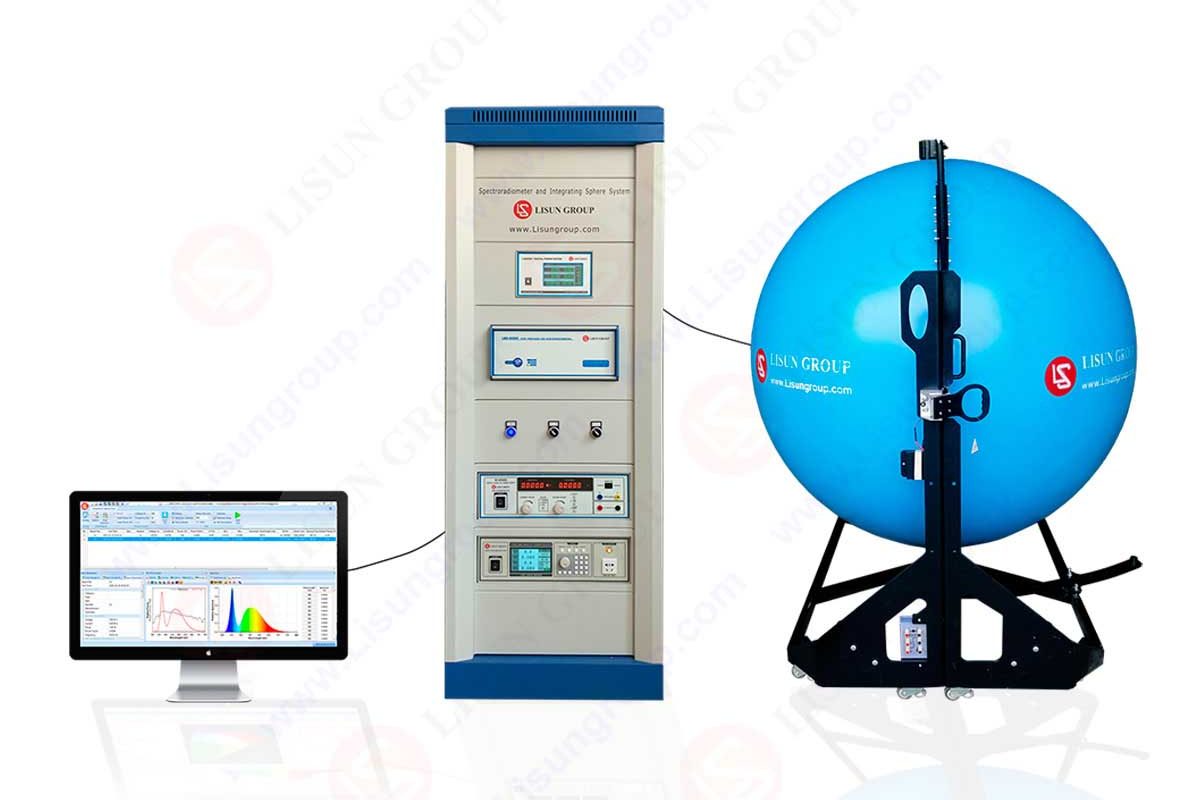
LPCE-2(LMS-9000)High Precision Spectroradiometer Integrating Sphere System
Lisun Instruments Limited was found by LISUN GROUP in 2003. LISUN quality system has been strictly certified by ISO9001:2015. As a CIE Membership, LISUN products are designed based on CIE, IEC and other international or national standards. All products passed CE certificate and authenticated by the third party lab.
Our main products are Goniophotometer, Integrating Sphere, Spectroradiometer, Surge Generator, ESD Simulator, EMI Receiver, EMC Test Equipment, Electrical Safety Tester, Environmental Chamber, Temperature Chamber, Climate Chamber, Thermal Chamber, Salt Spray Test, Dust Test Chamber, Waterproof Test, RoHS Test (EDXRF), Glow Wire Test and Needle Flame Test.
Please feel free to contact us if you need any support.
Tech Dep: [email protected], Cell/WhatsApp:+8615317907381
Sales Dep: [email protected], Cell/WhatsApp:+8618917996096
 中文简体
中文简体