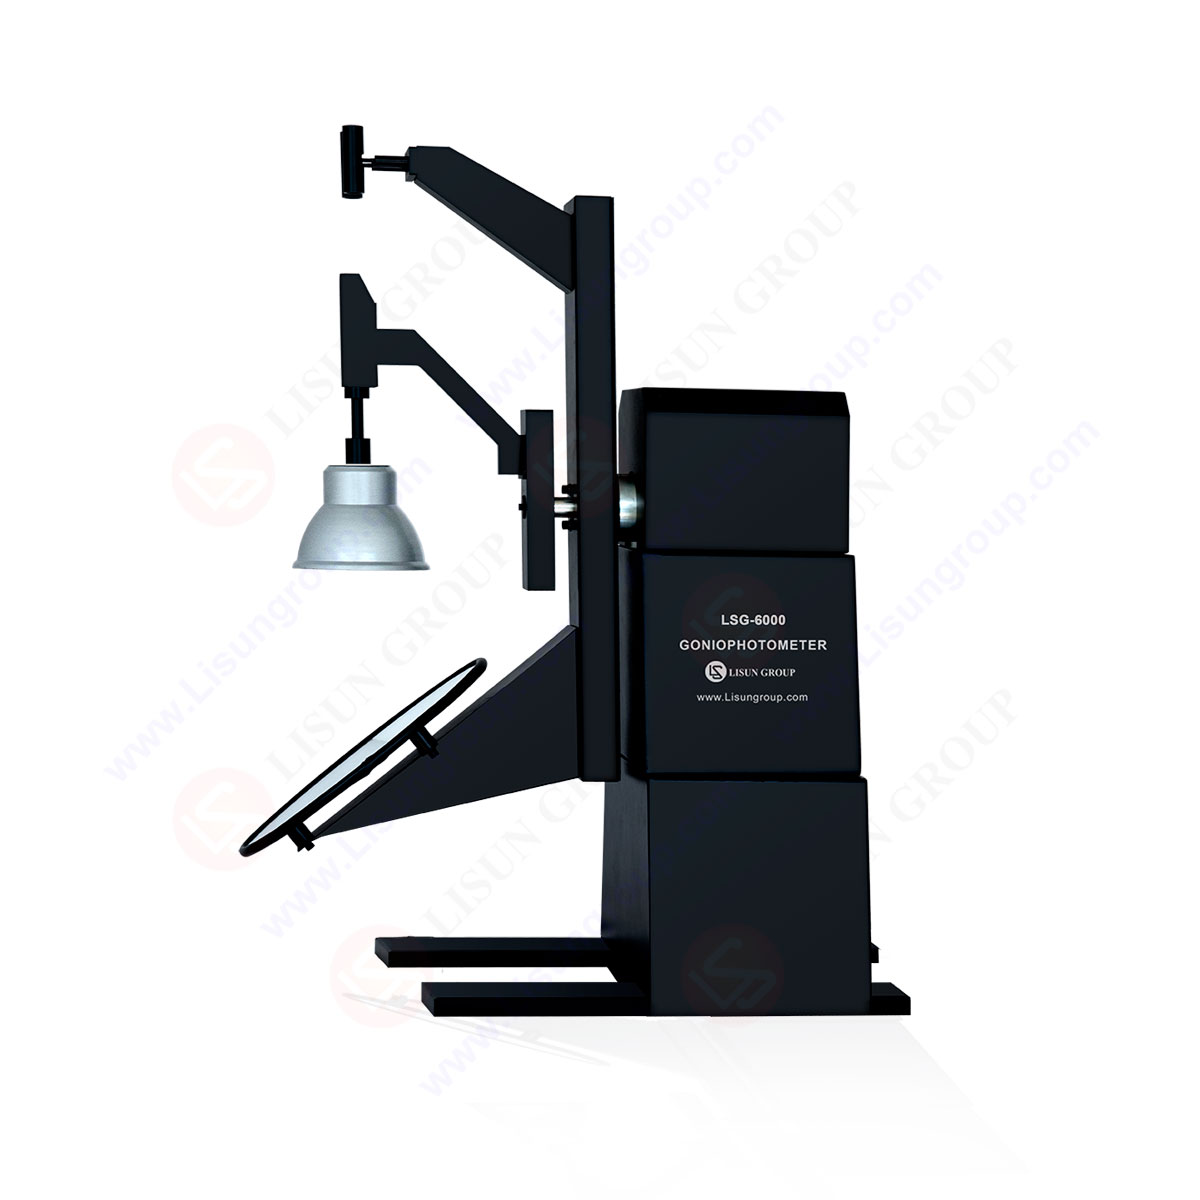
LM-79 Moving Detector Goniophotometer (Mirror Type C)
LSG-6000

High Precision Rotation Luminaire Goniophotometer
LSG-1890B
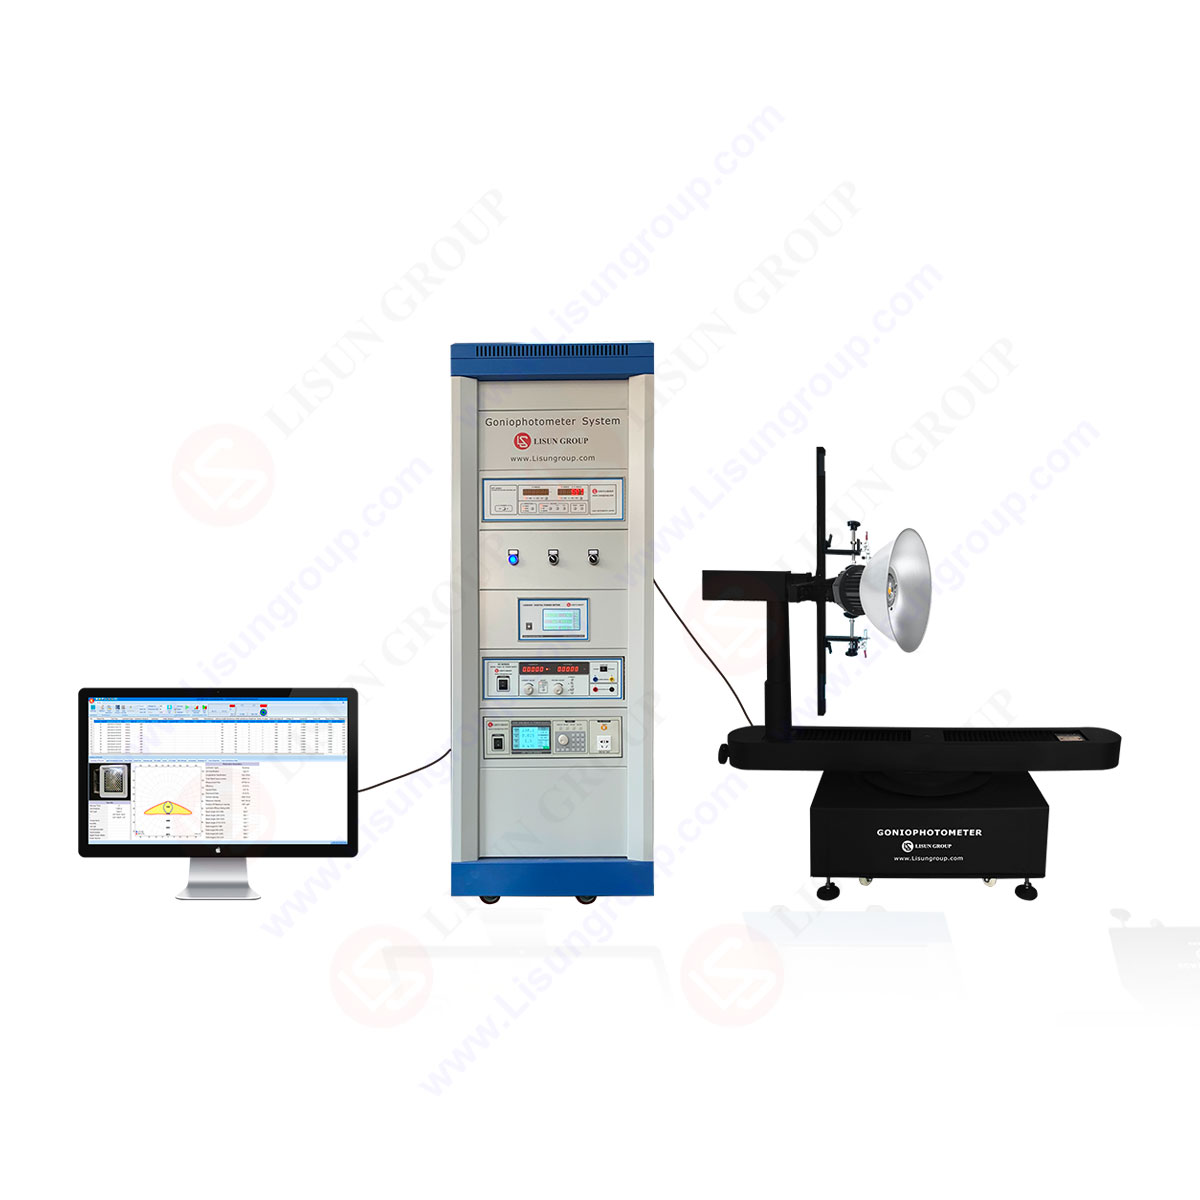
High Precision Rotation Luminaire Goniospectroradiometer
LSG-1890BCCD
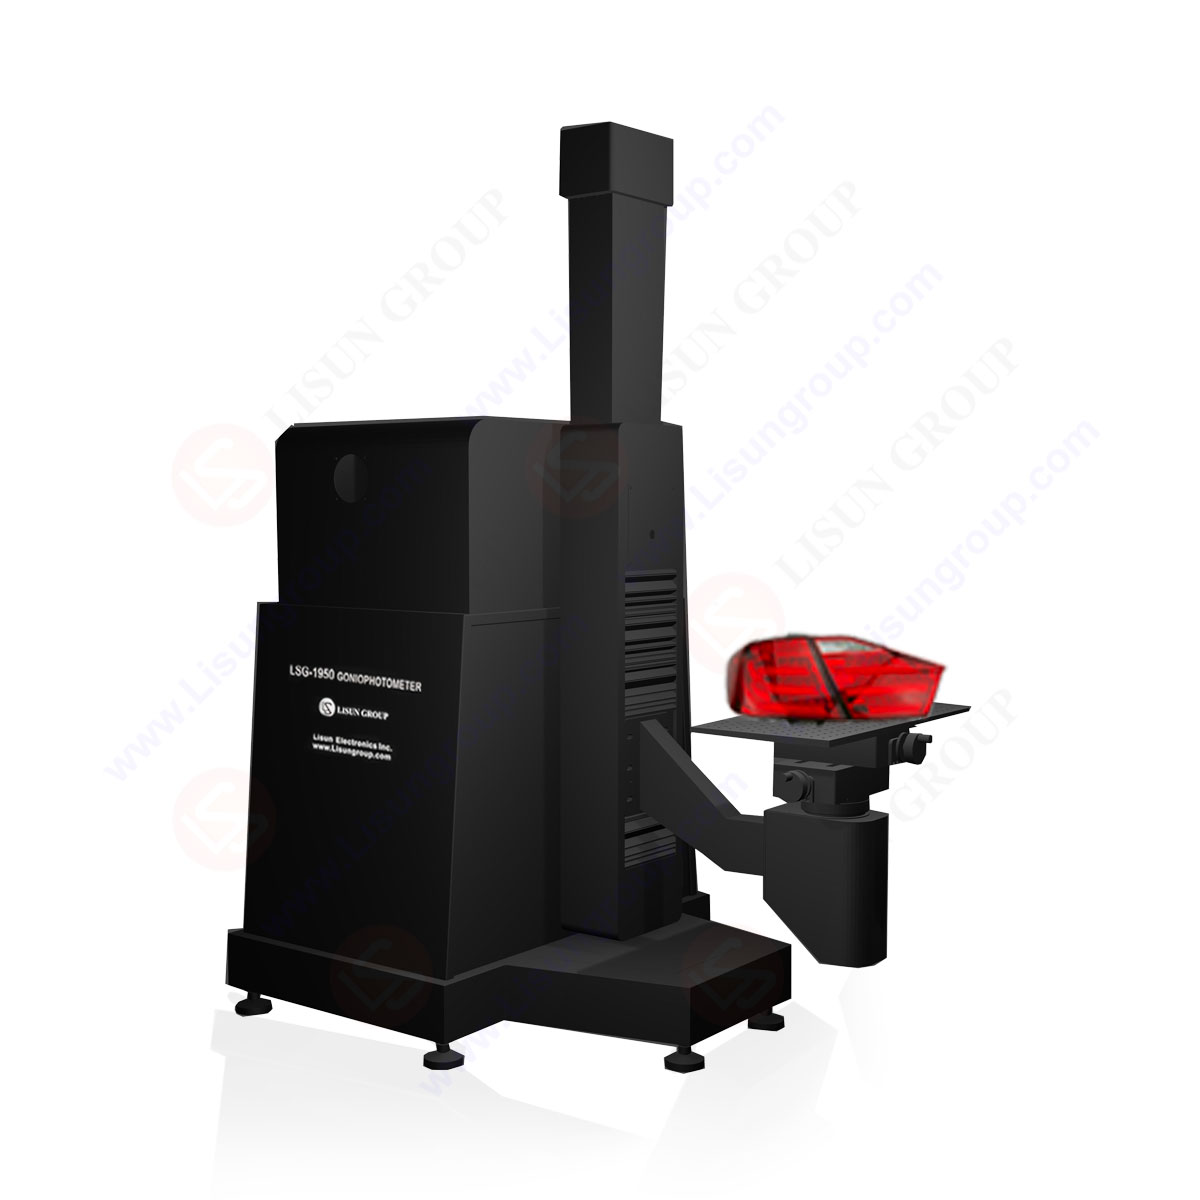
Goniophotometer for Automotive and Signal Lamps
LSG-1950
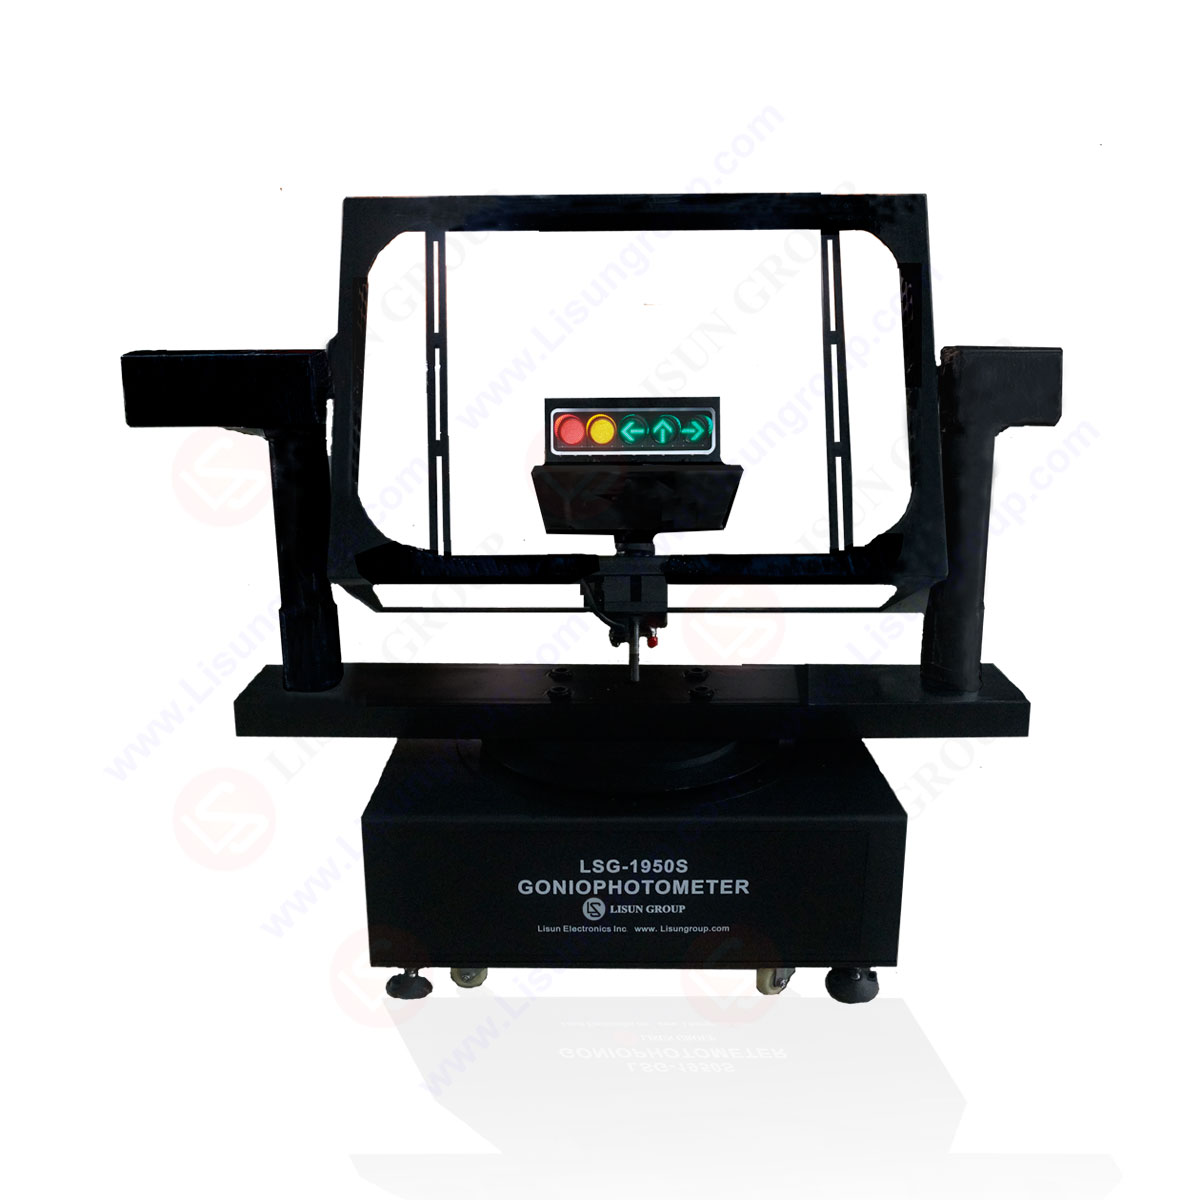
Goniophotometer for Traffic Signal Lamps
LSG-1950S
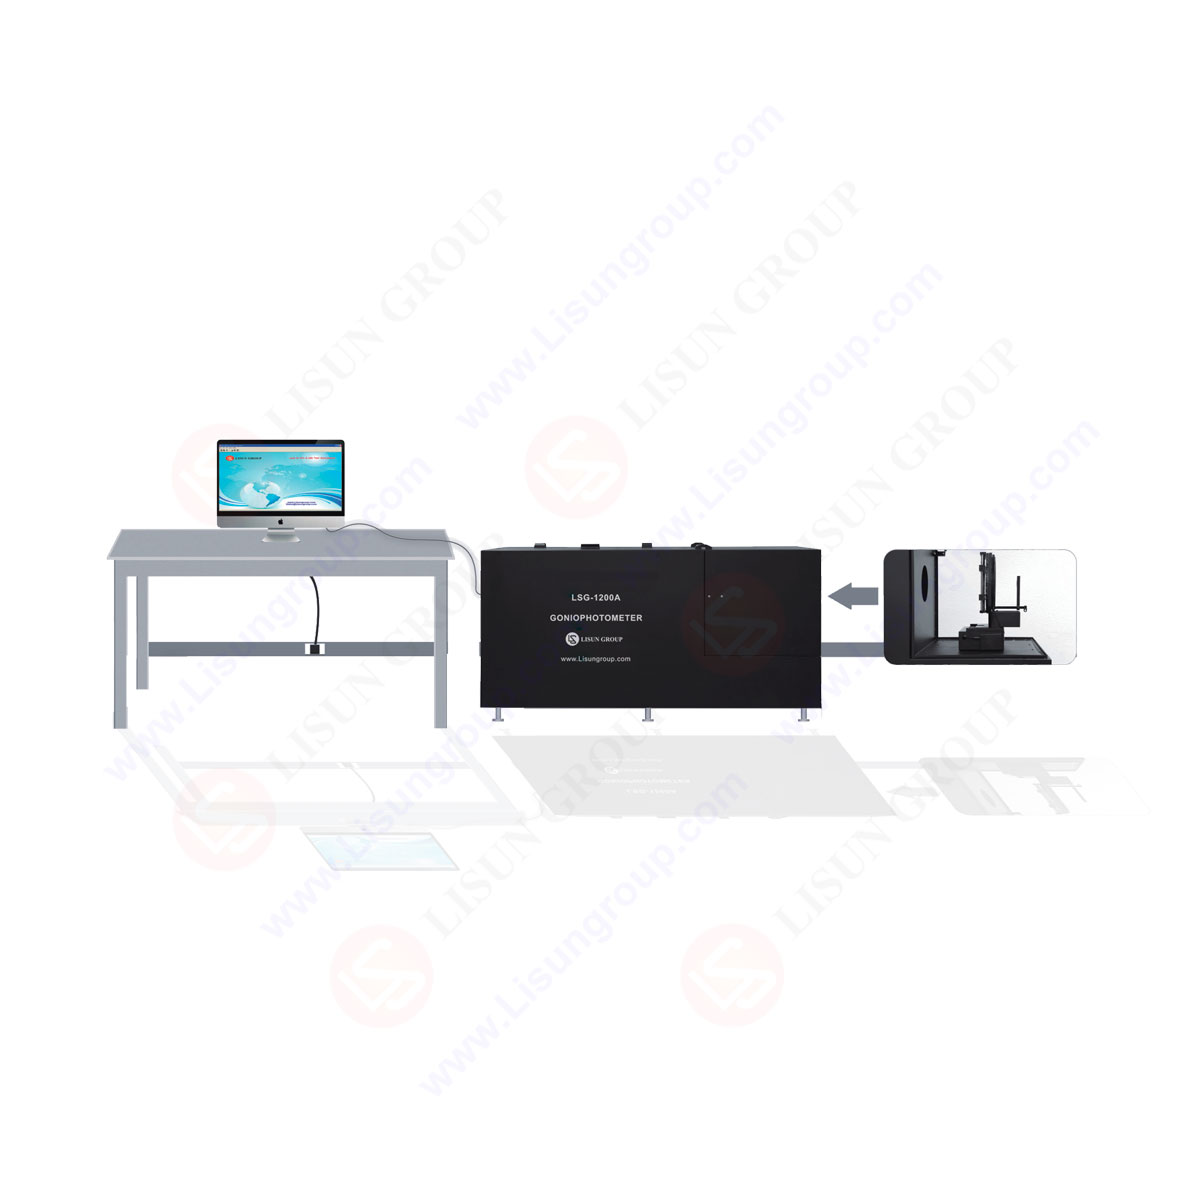
Compact Goniophotometer
LSG-1200A

Near Field Moving Detector Goniophotometer
LSG-1900B
Select an organization
to browse standards
The ozone aging test chamber is mainly used to study the action law of rubber, simulate and strengthen the ozone conditions in the atmosphere, and achieve rapid identification and evaluation of rubber’s ozone aging resistance performance and the protective effect of ozone agents; Furthermore, effective anti-aging measures are taken to improve the service life of rubber products.
1. Turn on the main power switch to power on the equipment;
2. Fix the sample on a fixture or place it in a turntable;
3. Press the “Start”, “Turntable”, and “Ozone” switches;
4. Set the ozone concentration and test temperature according to the requirements of the experiment;
a. Ozone concentration setting: click the “SET” key once, the green Nixie tube in the lower row of the instrument flashes, use the “” position option to move the position of the number of digits to be changed, and use the “” increase key and “” decrease key to change the size of the set value digits; After setting, click the “SET” button once to return to the measurement screen;

b. Setting of experimental temperature: Click the “SET” button once, the “number” digits in the lower row will flash, then press the “increase” and “decrease” buttons to change the value, and then press the “select” button to move to “ten” to flash the number. Adjust the value according to the above method; and so on, as long as everyone remembers that “” and “” “are used to adjust the” number “,” ” ” can be adjusted by adjusting the numerical value;
5. Set the test time according to the requirements of the test (time display unit: XX hours, XX minutes)
a. Display (chamber): during normal operation, the four digit LED Nixie tube on duty displays the delay value, and the four digit LED Nixie tube on the lower side displays the set value. The “XX. XX” in the upper red display box is the real-time display value of the delay time, with the unit of XX hours and XX minutes, indicating the time when the equipment has been running, and the “XX. XX” in the lower red display box is the display value of the set value, with the unit of XX hours and XX minutes, indicating the set value of the running time;
b. The method of setting TV time (delay value): within the display range, you can set the delay value of the relay at will by using the increase key and the position selection key. Press the position selection key in the first position, the POW indicator light will be on, and the lower first Nixie tube will flash; Press the increase key to set the first digit value, press the position selection key, the next second digit Nixie tube flashes, press the increase key to set the second digit value, and so on. After about 8 seconds, the flashing will stop automatically, press the reset key to make the working indicator light “POW” flash, and the instrument will automatically return to the normal working state, and the relay release time and pull in time set above will be automatically stored in the machine.
By using the reset button or resetting the outgoing terminals or re powering on, the delay device can start to delay. After the delay is completed, the relay operates according to its working mode;
a. After setting, be sure to check whether the red work indicator light “pow” in the upper left corner of the instrument panel is flashing (the counter will only count if the wind “pow” is flashing;
b. After each parameter setting modification, the Nixie tube will still flicker. At this time, it is unnecessary to ignore it. As long as no key is operated, wait for about 8 seconds, and the instrument will automatically return to the normal working state;
c. Throughout the entire setting process, it should be carried out continuously, with no more than 8 seconds between each two steps;
1. Keep the appearance of the ozone aging test chamber clean at all times;
2. Avoid external forces hitting the chamber;
3. Prohibit chemicals from coming into contact with this equipment;
4. After long-term use of the equipment, if abnormal noise occurs in components such as the motor blower, it should be inspected and attention should be paid to frequent cleaning and refueling;
5. Please do not place any items on the top of the test box to ensure good heat dissipation of the motor and control components;
6. If the temperature of electrical components is too high, the cause must be immediately checked;
7. After each use, the test chamber should be kept clean to prevent corrosion;
8. Clean the control cabinet once a month to prevent excessive dust from affecting the normal operation of the equipment;
9. It is absolutely prohibited to set a temperature that exceeds the maximum temperature specified by this device;
10. After the test is completed, the main power should be turned off, the water stains in the workshop should be wiped dry, and the test chamber should be kept in a dry environment as much as possible;
11. Ventilation fans should be installed in the laboratory to maintain indoor ventilation;
12. If the electrical components on the control panel of the test box need to be replaced due to malfunctions, please do not disassemble them without permission to avoid safety hazards and equipment malfunctions;
1. To purchase a device, you first need to choose a highly qualified manufacturer, and then start with environmental temperature, chamber volume, sample fixture, and ozone concentration
2. A highly qualified manufacturer is not only limited to strength issues and technical issues with equipment, but also important for subsequent after-sales service; From an environmental perspective: due to the different test temperatures required for many products, you only need to choose according to your own product needs;
Note the room temperature testing status here. If the laboratory where the equipment is placed does not have an air conditioning system, it is recommended to choose a refrigeration system when purchasing an ozone aging test chamber to avoid inaccurate test results when the room temperature is too high;
3. Chamber volume: It is recommended to choose the suitable volume size to avoid increasing certain costs; Test fixture: Some require static testing, while others require dynamic testing. The sample is clamped on the dynamic fixture of the ozone aging test chamber to observe the aging situation under the dual effects of mechanical fatigue and ozone accelerated aging; Others simply place the sample in an ozone chamber for aging;
4. Ozone concentration, usually tested at 50pphm or 100pphm for rubber, is required to be higher for rubber components used in wires, cables, or military products. When choosing an ozone aging testing machine, it is important to choose the concentration adjustable range of the test chamber, and selecting a suitable range can also improve the testing accuracy;
Ozone Test Chamber (or called Ozone Aging Chamber and Ozone Aging Test Chamber) is design according to rubber being sensitive characteristic of to ozone, it simulate the environmental to accelerate the rubber aging process by ozone. It compared to different products(test sample) aging result each other according to the same ozone aging test conditions/standards, and get to comparable aging resistance performance.

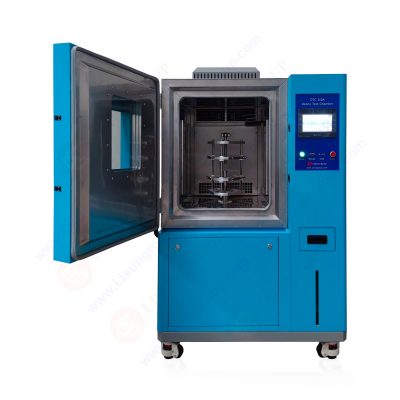
OTC-015A_Ozone Test Chamber
LISUN’s cable and wire test solutions meet IEC 60245-1, IEC 60227-1, IEC 60502-1 and IEC 60189 standards, covering electrical, mechanical, and safety tests for global compliance.


 中文简体
中文简体